Progress Tracking
Progress tracking is at the heart of Civil Tracker. Once your project has at least two flights and at least one material type you’ll be able to track progress.
To create a new ‘tracking area’, Simply go to the tracking tab for your project
From the drop down menu, select the material you want to create the tracking boundary for and click on it. Now simply draw the boundary for your material.
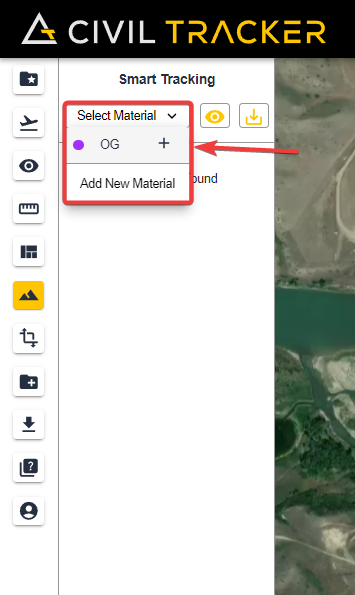
After finishing drawing the polygon, simply name your polygon and click submit.
Pro Tip!
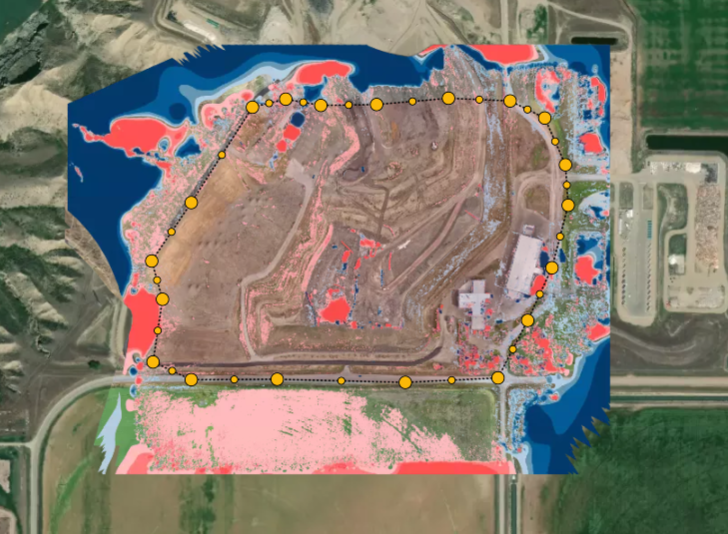
When selecting your tracking boundary, take your time and make it as accurate as possible to not include any unnecessary area within the boundary. This will help get you the perfect tracking values for your material. Below is an example of a tracking boundary with minimal noise
Create as many different tracking areas required to accurately track project progress.