Adding New Project

Go to the Project page of Civil Tracker and log in with your credentials. Under the project Tab, Just click on the “Create New Project” button to add new flight data.

Civil-Tracker-Project-Page

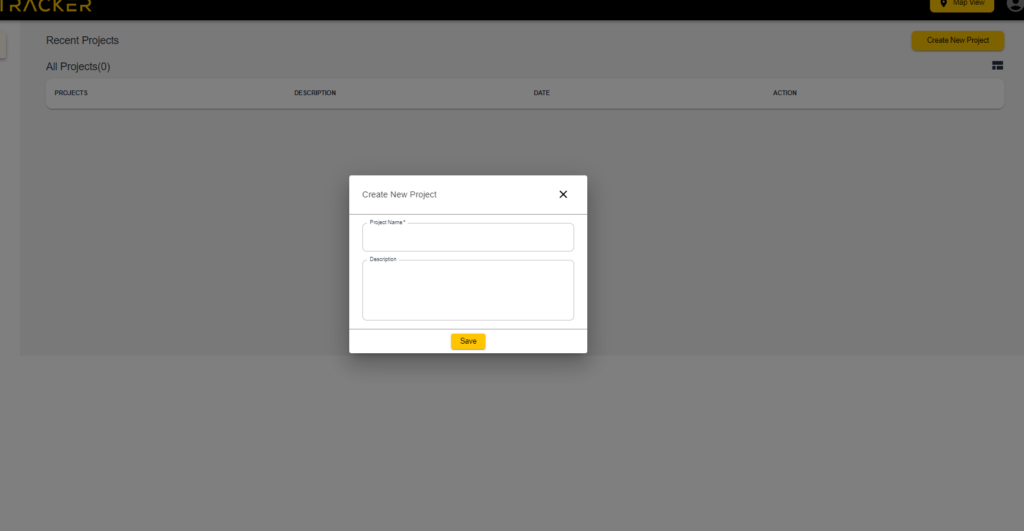
After clicking on “Create New Project”, You will get two options

GeoTiff & Raw Imagery

  • Raw Imagery is used when you need to upload raw image data for processing. After uploading the raw imagery data, you will get the ortho and the elevation model as deliverables.
Raw-Imagery-Upload
Here you can Set your project name, flight name and date. Also you need to upload the images along with the coordinate reference system and the GCP files (depending upon whether your flight is GCP or NON GCP).
  • GeoTiff is used when you already have the ortho (image) and the dsm (elevation model) and you just want to use the measurement or material tools at Civil Tracker or comparing different processed file.
Adding-Flight
Here you can set your project name, flight name and date along with the orthomosaic (image) and the elevation data (dsm)

Here’s a quick video showing how to add a new flight to a civil tracker project.