So you want to improve your drone mapping and make great drone maps? While making quality maps isn’t too complex, there are a few things you should be aware of before you launch your drone. It all starts will collecting good images. Following the tips below, will help avoid wasting your time and money. These tips will also help you get the impressive, clear and usable drone maps everyone is looking for.
1 Always Use an Autopilot
I feel both admiration and concern when I see and hear of pilots collecting data by manually flying the drone while taking pictures. Admiration because it takes a lot of effort, and concern because it almost never works. The results are disappointing at best, even if the photo looks ok, there are most likely flaws in the 3D model.
Most mission planning and autopilot apps do a great job of simple task planning. Draw a box and the app will create flight lines and picture locations, automatically. Fine tune by adding nodes to your boundary box and changing settings.

With so many DJI drone autopilot apps on the market, it can be difficult to pick the best one for your mapping needs. Take a look at our review of 9 auto pilot apps and decide which will be the best for you requirements. They all collect photos for drone mapping but, there are subtle and occasionally, major differences, that can make or break an app. One of our recommended apps is dronelink because it works on both iOS and Android. Other autopilot apps worth mentioning are: Map Pilot, DJI Ground Station Pro, Dronedeploy, Pix4D Capture, Drone Harmony etc. No matter which app you use, flying with an autopilot is our number 1 tip to make a great drone map.
2 Fly a Bigger Area than you need
Drone Mapping algorithms love lots of data. The algorithms need to ‘see’ the ground from several aerial photos in order to create a good-looking aerial image and 3D terrain. So what does this mean? If for example you want to map a 10 acre property, draw the autopilot box 50’ (15 m) larger than the area you need to map. Another helpful tip is to pay close attention to the flight lines rather than the box itself. When your flight lines extend to the edge of the area that you need to map, you’ll be safe.
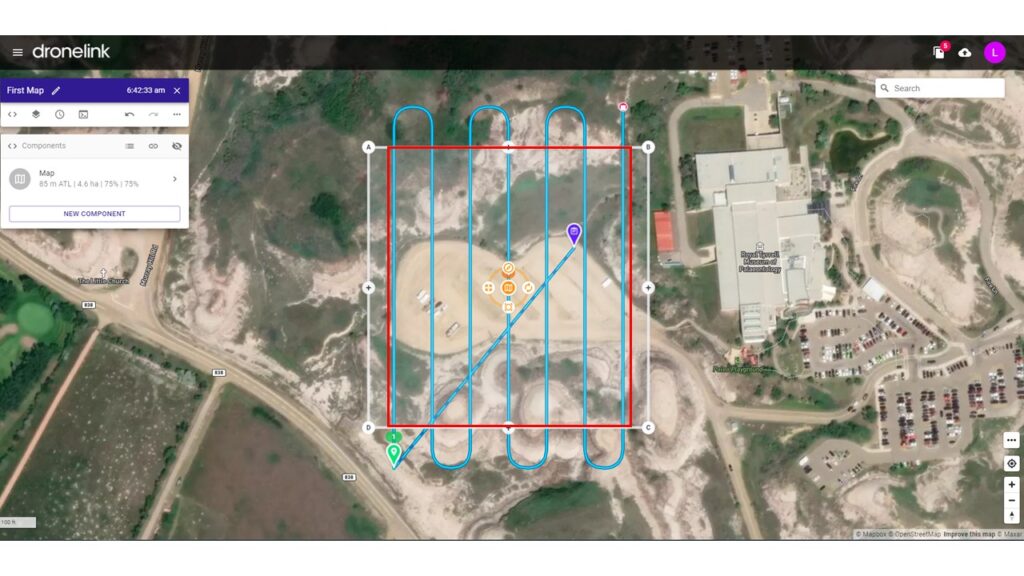
In the example above, you can be certain that everything within the red box will turn out well in the final processed map.
3 Fly With More Overlap
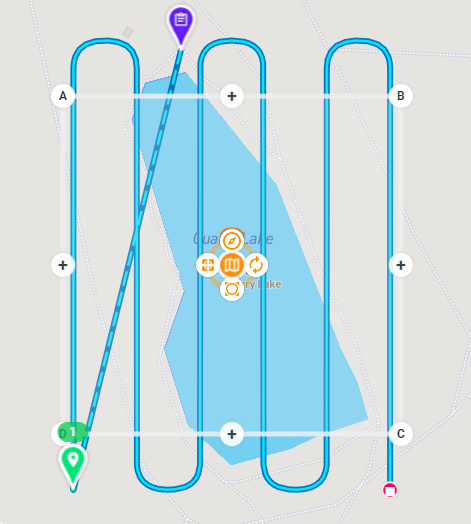
Overlap is key to photogrammetry processing. Too little overlap and there will be holes in the data, or inaccurate data. A general standard overlap is 75% front overlap and 75% side overlap. In some circumstances, you may need your overlap to be as high as 90/90. Flying an area at 85/85 will take over 2.5 times longer than a flight that is overlapped at 60/60.
For example, general mapping of construction sites, and diverse terrain use 75/75 to get the most accurate information.
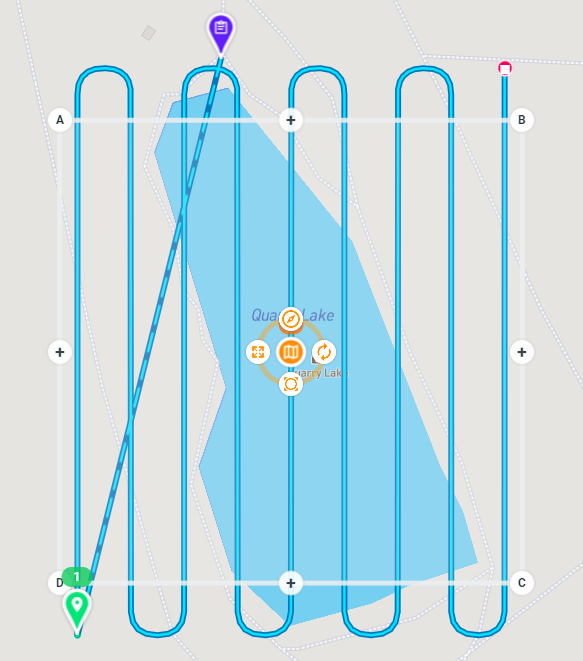
When mapping uniform areas such as dense forest, snow, and uniform crops, increase overlap up to 85/85, to obtain clear data.
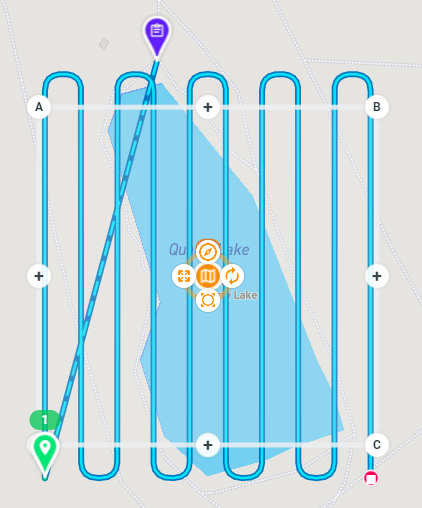
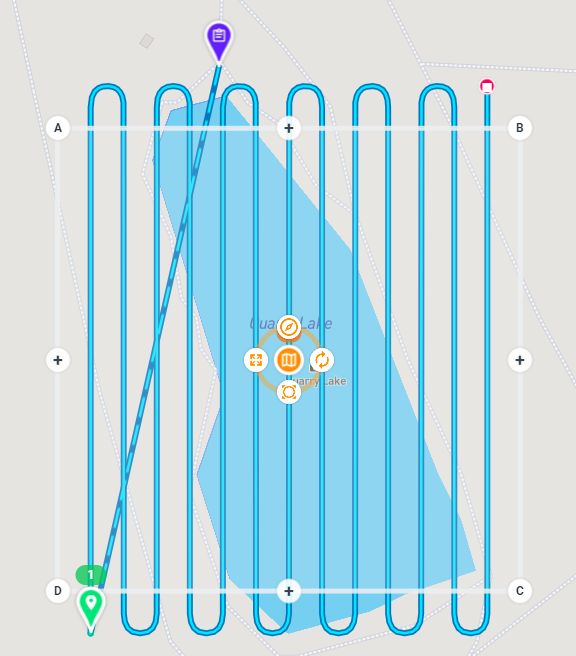
For example flying Quarry Lake at 85/85 will take 12:37. Flying at 75/75 will take 9:02.
Standard 75% / 75% Overlap
High 85% / 85% Overlap
Pro Tip. Cameras with larger sensors allow in more light and can be flown with lower overlap than camera’s with smaller sensors. Depending on the camera quality this can be dropped as low as 65/65. But unless you’ve spent a few thousand dollars on just the camera, this doesn’t apply.
4 Choose the Right Altitude
Mapping cameras have a fixed focal length with no zoom, which is a good thing. This means the lower you fly, the higher the resolution and vice versa. Choose the altitude of the drone based on desired resolution.
The standard resolution is 1” or 2.5 cm. For most drones this is accomplished flying between 70 and 120 m *AGL.
70 m AGL (2.49 cm GSD)
121 m (440’) AGL = 4.3 cm GSD*
Other considerations are flying high enough to avoid collisions and crashes but flying low enough to meet regulatory requirements.
5 Normal vs. Grid Pattern
The normal pattern is also called the lawnmower pattern and is used 80% of the time when mapping. The drone flies a similar pattern to my Saturday lawn mowing routine. Back and forth slowly moving across the area needing to be mapped.
The grid pattern starts as a normal lawnmower pattern, then repeats the entire pattern at a 90-degree angle.
Normal (lawnmower)
Grid Pattern
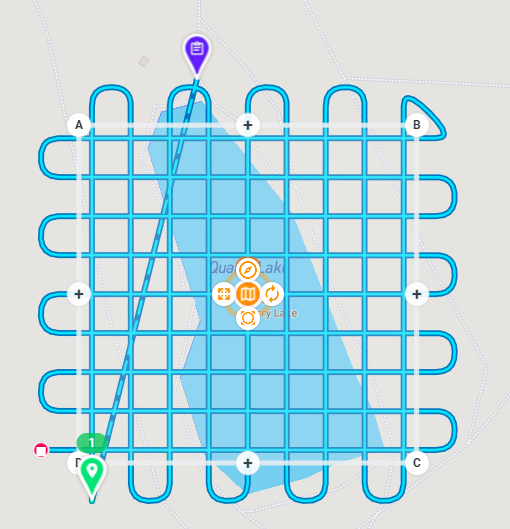
I will fly my drone in a grid pattern when mapping urban environments, areas with buildings or when I want the best accuracy I can achieve. It can be very helpful to create 3D models of buildings, or when flying very hilly and rolling terrain. The additional data helps the algorithms create better maps.
6 Pick the Best Camera Angles
Most of the time mapping with the camera straight down is ideal. However, if flying over steep terrain or trying to generate 3D models of buildings and other objects, the camera angle will need to be adjusted. In these cases, raising the camera by 10 or 15 degrees can be beneficial. This results in oblique* imagery rather than nadir* imagery.
If you’re mapping buildings and steep terrain pairing the grid pattern from tip #4 and an oblique camera angle will generate the best results.
As a general rule, keep your camera down and focus on mowing the lawn.
7 Does Drone Speed Matter?
The speed of the drone can be set in most autopilot apps. There’s not usually any advantage to flying slow. The few exceptions are if flying in low light, low altitude, or if the software being used doesn’t compensate for rolling shutter cameras.
If you’re flying at 200’ or above with good light, 30 km/h is safe even with the small Mavic Mini. If you’re altitude is any lower than 200’ then slow the aircraft down or significant motion blur can occur.
Also, it’s good to note that flying slow doesn’t increase battery longevity for multi rotor drones. Remember, most of the power goes to keeping the drone in the air. It’s more efficient to be moving forward than just hovering.
8 The time of day matters
More specifically light matters. In an ideal world all flights would be flown with the sun overhead, but in northern (or southern) areas the sun doesn’t get high in the sky for months at a time. The long shadows created early in the morning and evening can wreak havoc with the terrain model results.
It’s much better to fly when it’s either sunny or overcast. Sporadic clouds can lead to variable lighting.
Low light conditions have a disproportionate effect on the small consumer grade camera’s most drones use. Low light leads to a cascading series of events, i.e. the lower the light the longer the shutter is open and the more motion blur.
To summarize, when possible fly when the sun is high in the sky.
9 Don’t Play (too much) With Camera Settings
Underexposure and overexposure both make photogrammetry reconstruction difficult.
The shutter speed can also affect accuracy of the resulting terrain models and point clouds. A slower shutter speed allows more light in suboptimal conditions, but too slow and there will be image blur.
Most of the time an automatic exposure works best with focus set to infinity.
10 Check your images before processing
It’s not very glamorous or fun to look through the images before uploading them for map processing. However, its valuable feedback to you as a pilot. Remove any images that are blurry, or were accidentally taken that aren’t going to contribute to processing the map.
Use Civil Tracker to Make Great Drone Maps
Keep in mind that you can map 2 acres a minute with the drone. On most jobs you will spend much more time driving to the job, planning your flight, checking weather and prepping the drone, than you’ll spend with the drone in the air. Eliminate any doubt and fly a 12-minute mission not a 10-minute mission, avoid having to waste an hour repeating the entire process if the map doesn’t turn out the way you want it to.
Now that you’re confident that you’ve collected a great set of drone images and you’re ready to process them into a map. Sign in or Sign up for Civil Tracker to turn your images into maps.
Definitions*
AGL – Above Ground Level
GSD – Ground Sample Distance
Nadir – Camera is pointing straight down. Default setting for aerial mapping.
Oblique – Camera is pointed at an angle instead of straight down. Recommended for steep terrain or for 3D model generation.