Compare your drone survey with your civil design surface to find cut and fill elevations and volumes
One key to effective construction and site management is the ability to accurately know how much work is left to finish. Your goal may be to determine the airspace in a landfill, how many yards of clay to achieve design grade, or how much cut remains in a slope. You can now accomplish this with the design surface cut fill feature in Civil Tracker.
You already have accurate drone surveys with Civil Tracker, now you can take it a step further and compare the drone survey with the design surface.
Oh, did we mention it’s easy to get started? It just takes a few clicks to export design files from Civil 3D and upload them to Civil Tracker. Find out how below, then sign up for your free trial.
Continue reading to learn:
- What file types and formats are compatible with Civil Tracker
- How to export design surfaces from AutoCAD Civil 3D
- Upload your design surface into Civil Tracker
- How to visualize and measure the results
File Types and Compatibility
You can upload three different design surface formats.
- Geotiff (single band raster)
- DXF (with triangles)
- LandXML (with surface components)
Geotiff is the recommended and preferred format as there are less variations.
Prepare Your Design Surfaces in AutoCAD Civil3D
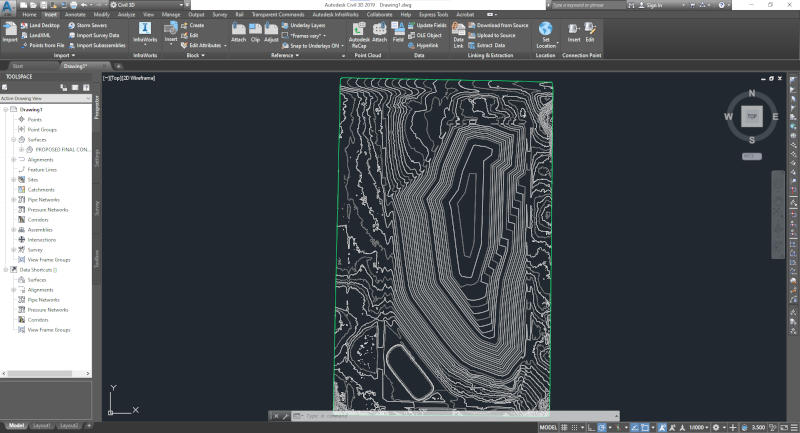
- Create a surface in AutoCAD Civil3D
- Export the surface to a Geotiff DEM
- Export the surface as a LandXML
Geotif Creation in Civil3D
I won’t cover the details of how to create a surface in Civil 3D that’s a little beyond the scope of this knowledge base, but check out Civil3D knowledge base for help. If your site has a design, then it will likely be in a Civil 3D surface or equivalent in other software packages.
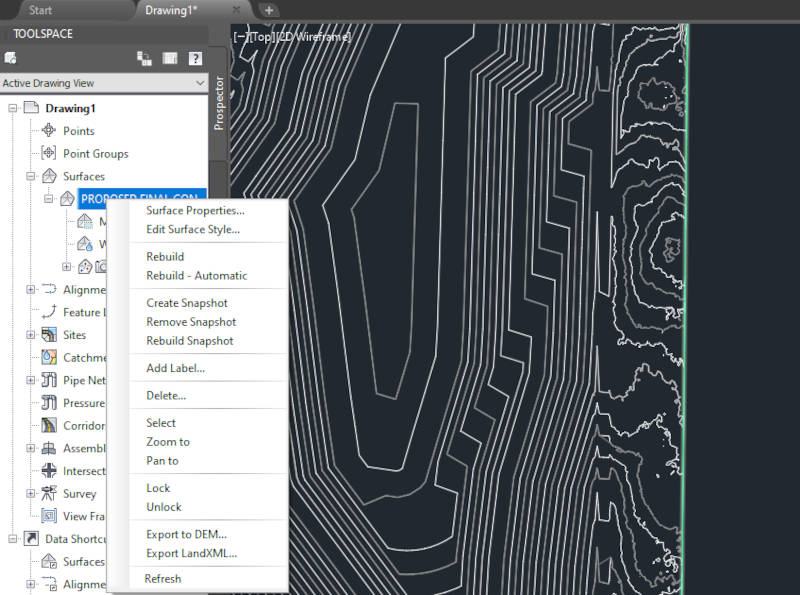
Right click on the surface to Export to either a DEM or LandXML.
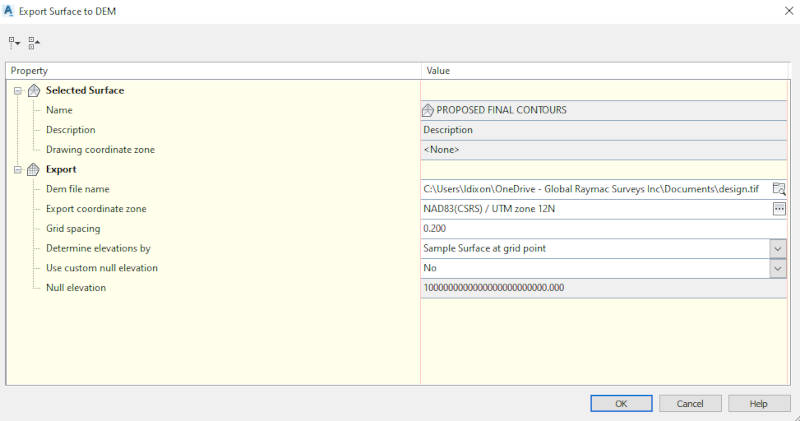
To Export a surface to DEM we recommend the following settings.
- File Name should end with tif and not dem
- Export coordinate system should be the one used for creating the design
- Grid spacing is somewhat subjective. We recommend 0.2m cell spacing. If you select larger spacing some details may be lost, if you use smaller spacing the file size and calculation times will increase.
- Click Ok to start exporting.
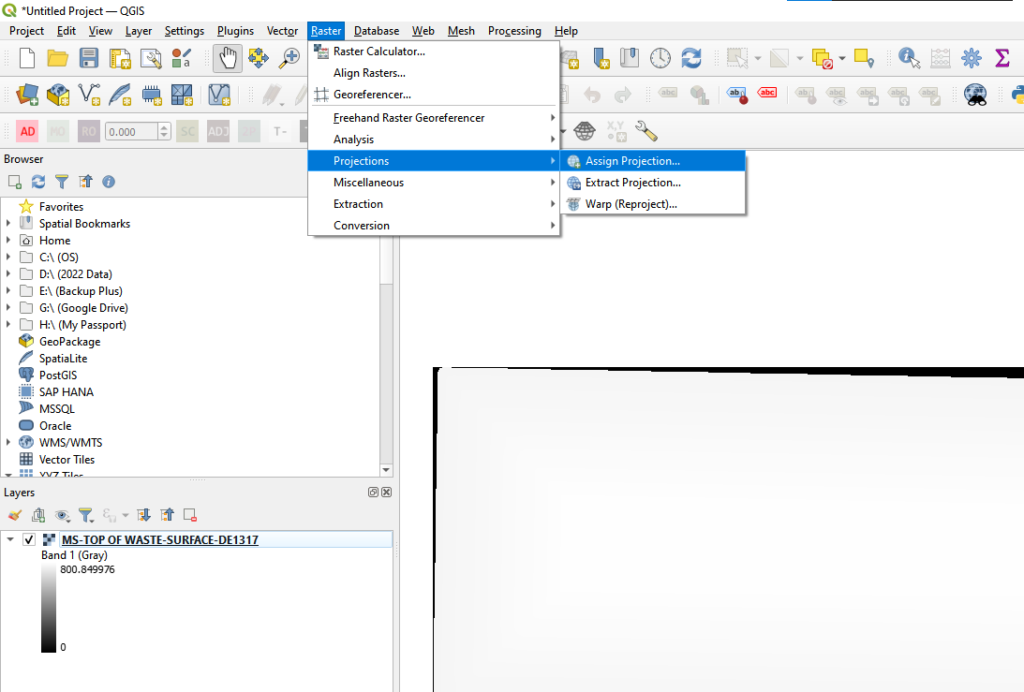
Civil 3D doesn’t usually assign the projection in a GIS friendly manner. We recommend loading the tif file exported from Civil3D into QGIS. The correct EPSG code can be assigned using the Raster > Projections > Assign Projection tool.
Click on the select CRS button
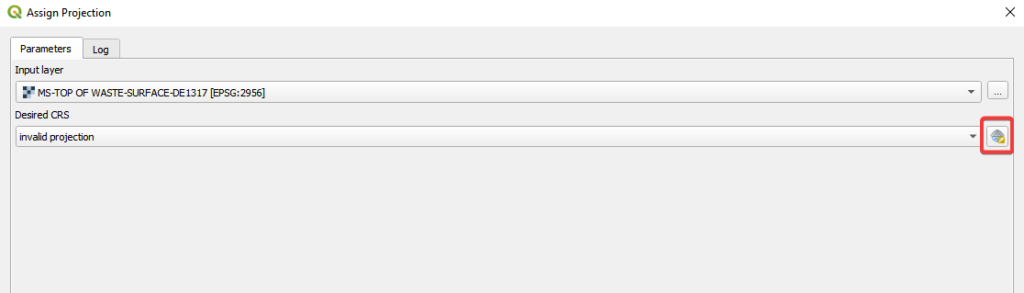
Select the correct CRS and finish running the tool.
After this the geotif is ready to upload to Civil Tracker.
LandXML
LandXML files may not have the desired accuracy in Civil Tracker. We recommend exporting a geotif from AutoCad Civil3D instead of uploading a LandXML into Civil Tracker.
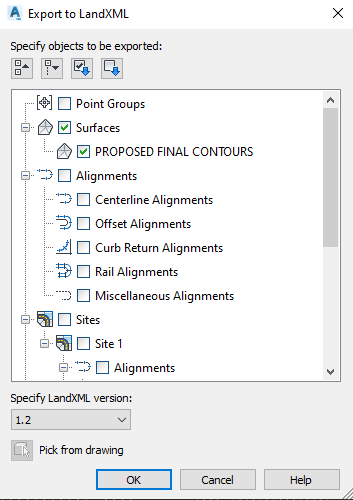
For LandXML there aren’t as many settings to work with. The key is to only select a single surface. Do not select another other Civil3D features for export to LandXML.
DXF Option
The 3rd export option is a DXF. Because there are not many ways that lines can be stored in a DXF, this option is not recommended. However, if using a DXF ensure that it contains triangles with elevations at each of the 3 vertices. Below is an example.
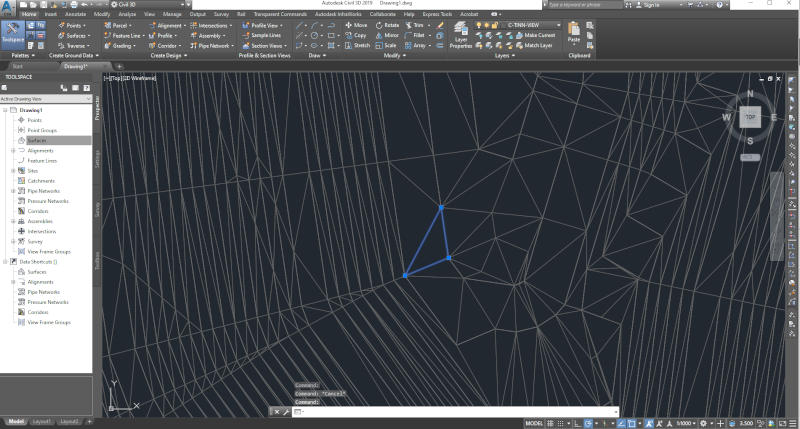
The DXF should not contain any other features such as parcel information, feature lines, breaklines etc. Only triangles.
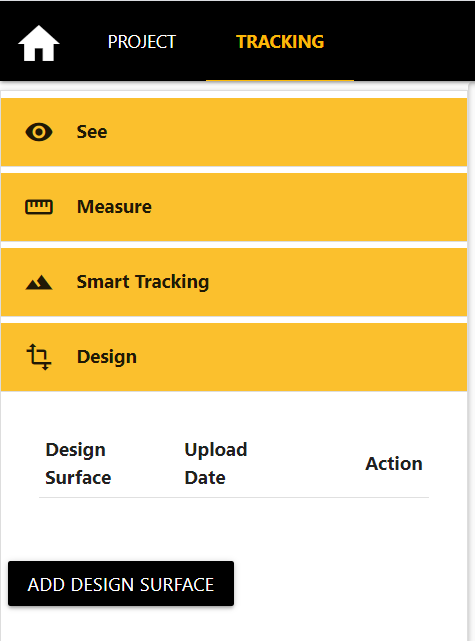
Upload Design File to Civil Tracker
Click on the add design surface button to open the upload form.
Within the Design Surface upload form you’ll want to:
- Enter a name for your design surface.
- Click and select your design surface file.
- Enter the ESPG code for the coordinate reference system of the project.
- Click ‘save file’ to start uploading the design surface.
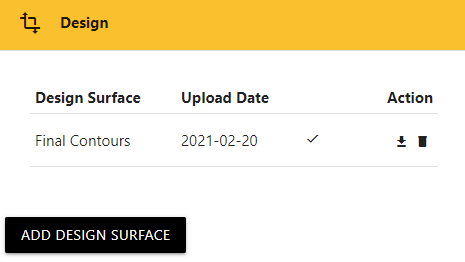
Once the design surface upload and processing are complete, you’ll receive an email notification and the processing symbol will change from processing to a check mark
.
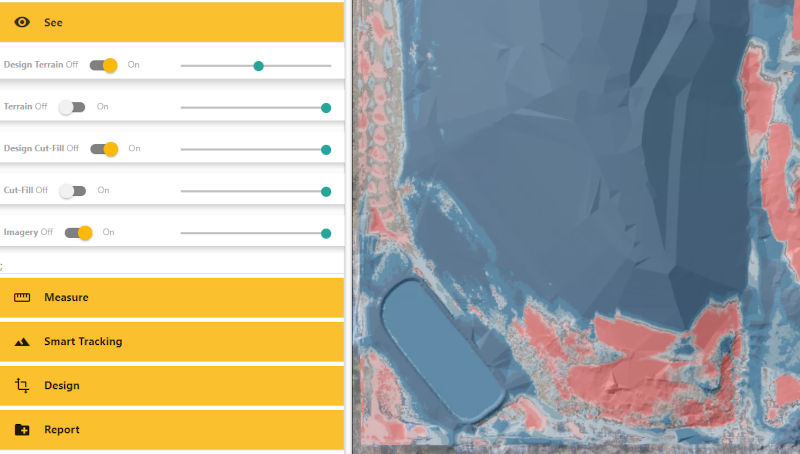
Visualize The Design Surface
Head over to the ‘See’ accordion to take a look at the design surface.
Visualize The Design Cut Fill
Turn on the design cut-fill to visualize the cut fill comparison of the UAV flight versus the design surface.
Measure Cut Fill Elevations at Individual Points
Measure the cut fill elevation between the drone surface and the design surface, anywhere on your site.
- Click Measure Accordion
- Click on Create Point
- Chose the location of the point
- Give the point a name
Measure Cut Fill Volumes
Measure the cut fill volume between the drone surface and the design surface anywhere on your site.
- Click Measure Accordion
- Click on Create New Polygon
- Draw Polygon and Double Click to Finish
- Give the Polygon a name
- Click the refresh button to refresh measurements
We’re excited to empower you and your team with exciting project management tools. Please follow up with any questions or suggestions.
FAQ
Q: Can I upload multiple design surfaces into a single project.
A: You can only upload a single surface at any given time. Uploading a new design surface will overwrite the previous one.
Q: Can I download my design surface from Civil Tracker
A: Yes. You can download a copy of the design file that was previously uploaded.
Q: Who is this for?
A: For engineers, surveyors and construction managers who need to measure their design surface cut fill and find how much remains to achieve design grade.
For Waste Management professionals, who want to compare the engineered cell design with their drone survey, to determine remaining airspace.