What are Ground Control Points, and What Purpose Do They Serve?
Ground Control Points (GCPs) are large photo-identifiable targets that are placed on the ground within the boundary of your drone survey. GCPs are the not so secret weapon that turn maps from low-cost consumer drones into survey grade products. The resulting data can be used for engineering design, construction progress monitoring and precise mapping applications.
You may map using low cost drones without ground control points. The relative height of a stockpile will be precise, but the absolute position of that same stockpile or object will deviate about 5m (15′) horizontally and 20m (60′) vertically from its true location. The high relative precision allows you to calculate good stockpile volumes or measure the length of a field within a few percent. However, the low absolute accuracy makes it impossible to use for engineering design or to track change through cut-fill analysis.
Size and Shape of Ground Control Points
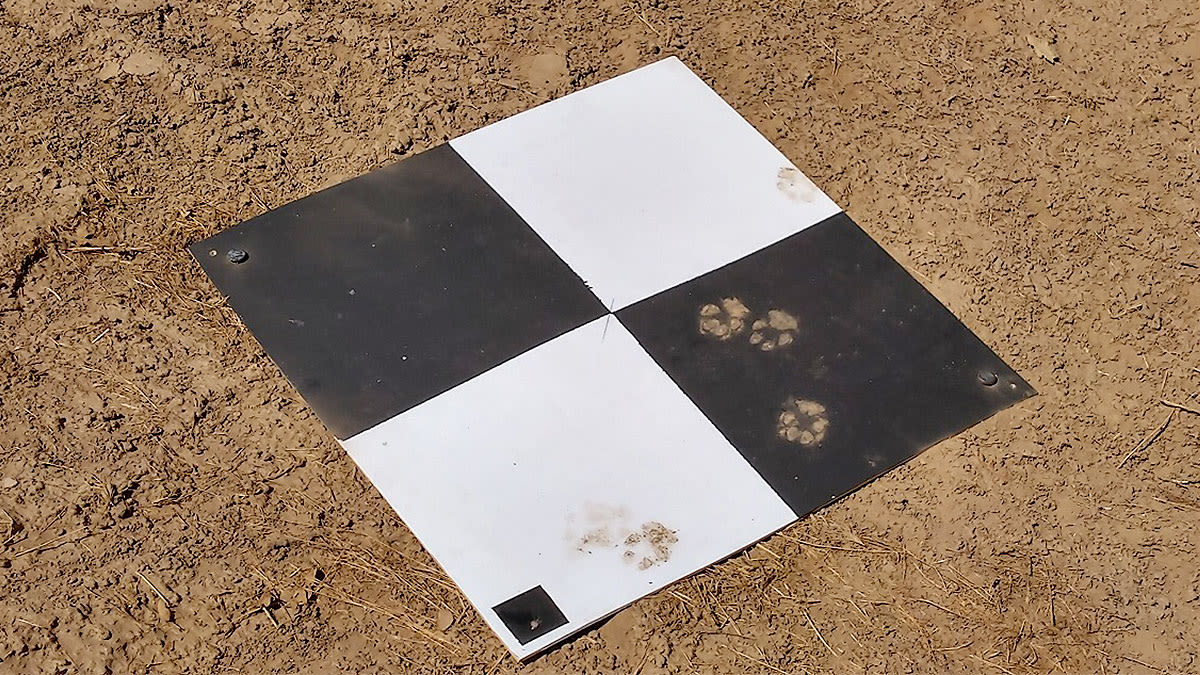
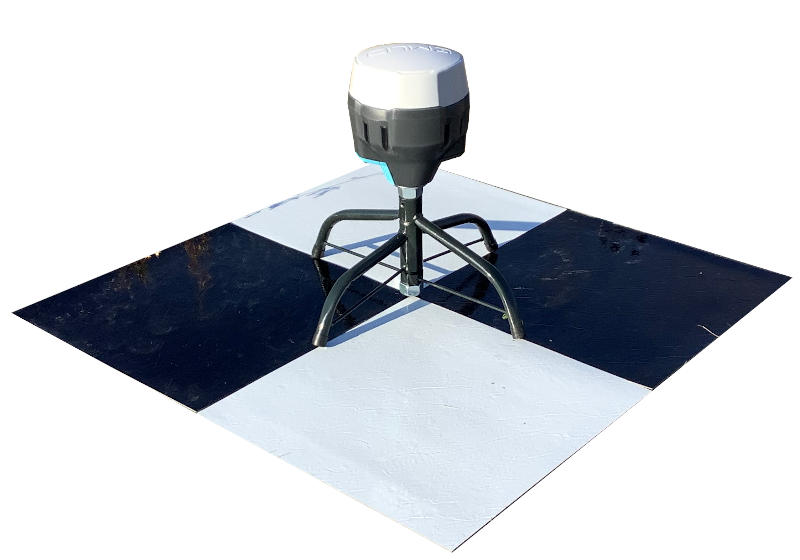
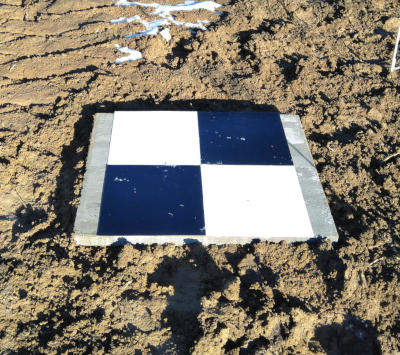
The standard square is about 60cm x 60cm (2’ x 2’). This shape and size are easily detectable when creating GCP marks on images before processing the flight. For ultra high resolution cameras or low altitude flights, smaller GCPs may be acceptable. Larger GCPs are typically only required for manned flights. There are numerous variations in shape, size and color.
Temporary Ground Control Points
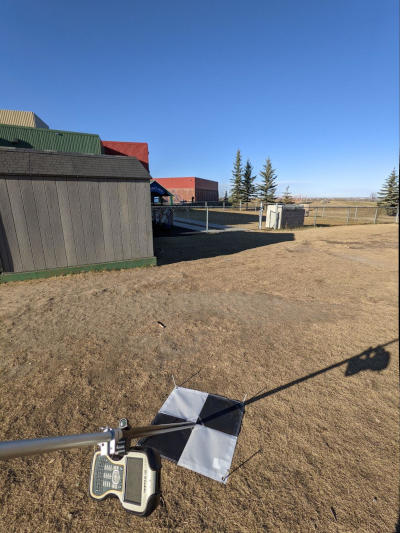
Reusable black and white checker vinyl targets can be purchased and used repeatedly. A freshly painted ‘X’ on the ground typically appears very well when picking GCPs from drone images.
The ideal colour will depend entirely on the background terrain colours. This is affected by where you live and the time of year. The contrast within the GCP itself is also important.
- Black and white works reliably and has been a standard for a long time
- Orange spray paint is very visible
- White V shapes work well
Exceptions include snowy winter operations, which require clearing snow and using colours that stand out. Fortunately, the black on a black and white checker pattern works well even in winter, provided it isn’t snow covered!
Permanent Ground Control Points
Installing permanent ground control points is a big time and cost savings for repeatedly flown projects, or where you may not have access to survey grade GPS whenever you do a drone flight. Our favourite permanent ground control point is a 30″ x 24″ patio block. White and black squares are painted on the patio block. In a vegetated environment, it can pay off to put down some landscape fabric around the Ground Control Point to prevent it from growing over and becoming invisible over time. Read more about installing permanent GCPs.
Leverage existing features as ground control points.
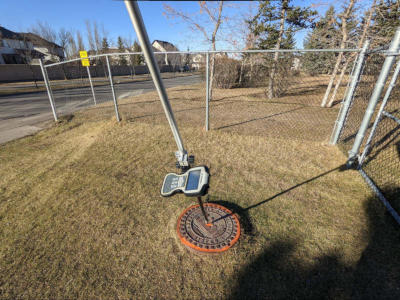
Use of natural photo-identifiable targets such as traffic arrows, catch basins, etc. Natural targets are useful whether for a single site survey or when revisiting a site regularly. The best practice is to take a picture of the object being used as a permanent ground control point so that it’s easy to distinguish which manhole, paint line, etc., are the GCPs and which ones are not. You don’t want to mark the wrong manhole accidentally!
Example of Bad GCPs
For every good Ground Control Point, there is likely a bad Ground Control Point. Some of the key things to avoid when placing GCPs are don’t place them too close together, don’t use something that has any height to it, don’t place the GCP on a side slope, don’t put the GCP in an area that can be disturbed before your flight.
Don’t put GCPs Too Close Together.
If multiple GCPs appear in the same drone image, it can be difficult to differentiate between them. This can be somewhat mitigated by writing the GCP number beside the GCP. A quick rule of thumb is do not put GCPs within 300′ (100m) of each other.
Don’t use GCPs with Height.
I’ve seen new drone pilots use 5-gallon buckets, traffic cones, fire hydrants, groundwater monitoring wells and many other objects that, while very visible in the image, create very poor results. That is because all of these objects are not flat. It’s important to use only flat objects for GCPs
Don’t place GCP on a side slope.
Placing GCPs on a steep side slope will lead to inaccurate elevations. Always pick a flat area for your GCP. Use a shovel and flatten a 2′ x 2′ area if necessary before placing/painting a GCP.
Don’t Place GCPs where they may be disturbed.
It’s disappointing to go through a lot of work to lay out GCPs and find that some of them were destroyed or removed between surveying them and when you flew the mapping plan. If you’re on a busy site, place them out of the way of working equipment. It can also be a good idea to let everyone know what the GCPs look like and instruct them to stay away from GCPs. Sometimes, even one missing GCP can ruin the accuracy of the drone survey.
How Many and Where to Place GCPs
While technically, many drone mapping software can work with as little as 3 GCPs. The best practice is to use a minimum of 5 GCPs for a flight area.
Placing GCPs is similar to holding down a tarp in the wind. You want to start by placing a GCP at a corner or sharp direction changes in your project area. However, if a gust of wind catches your tarp, the middle can easily blow up in the wind. The exact same thing can happen with a drone map. It’s called doming. You want to place one or more GCP points inside the mapping area to prevent doming.
The effectiveness of a GCP is inversely proportional to the distance from a GCP. The area close to a GCP will be very accurate; the further from the GCP, the less accurate the results. Drawing an imaginary circle around each GCP with a 200m radius can be beneficial. The area that falls outside the circles will be of lower quality. The 200m radius is for low end drones such as the DJI Mini series. The imaginary circle can be larger for better cameras like the DJI Mavic 3 or DJI Phantom 4.
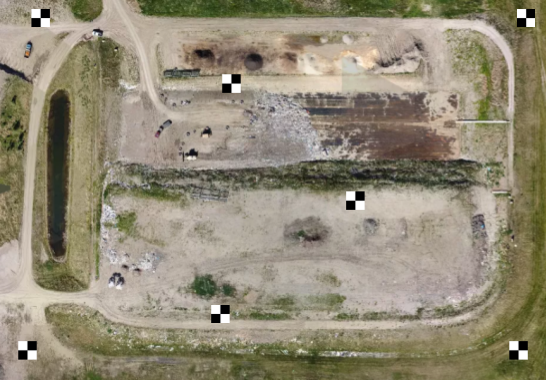
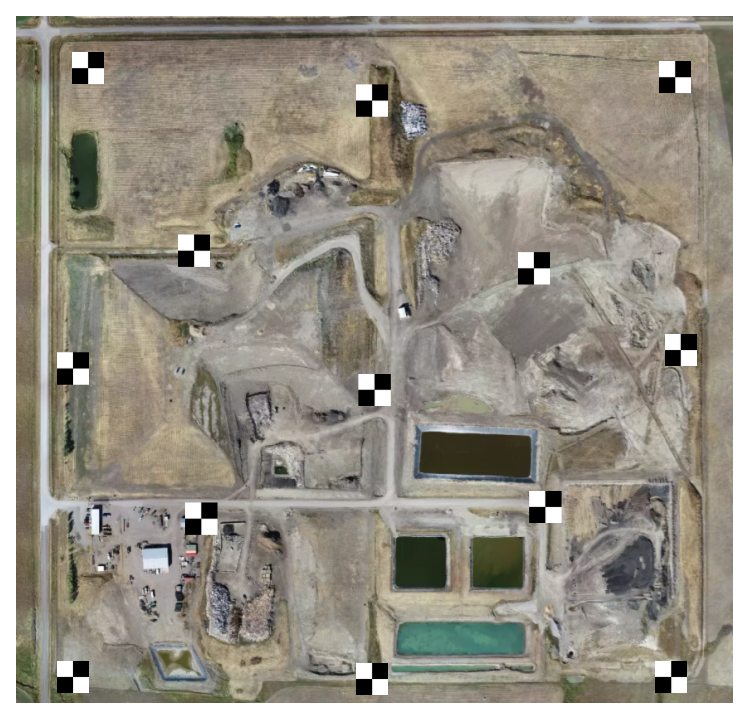
Example 1: GCPs for a 20 acre Landfill Cell
Mapping a medium size site such as a 20-acre landfill cell should have a minimum of 5 GCPs but 7 is a safer number to use. The example below shows a well controlled drone survey of a 20-acre site.
Key attributes of this GCP layout.
- GCPs are set at each corner but inset at least 15m (50’) from the mapping boundary.
- The central portion of the survey has 3 GCPs to prevent any “doming” in the drone survey.
- GCPs are set at the highest and lowest points of the site.
Example 2: Surveying a 160-acre quarter section
Mapping a large area, such as a half mile by half mile quarter section, for survey grade accuracy using GCPs, is a significant undertaking. The example layout below has 13 GCPs spread throughout the site.
The edge and corners are well marked out with GCPs, but note that the GCPs are all set slightly inwards on the project area to ensure they appear in enough images when flying.
Example 3: Surveying a Road or Corridor with GCPs
Mapping corridors is slightly different from mapping areas. The three best practices for placing GCPs on a corridor are as follows.
- Place them as far off the centre line as possible yet still visible in your flight pattern.
- Alternate sides of the corridor.
- Place a GCP every 200 – 300m along the corridor.
The example below shows a straight one mile long road segment with 9 GCP locations distributed along the length of the road. Key details of the GCP placement are listed below.
- Not placed near the centre line of the road or on the road itself, but instead staggered 50m / 150ft from the centre line, on each side. This controls the ‘roll’ of the drone survey.
- Spaced every 200m (600’) along the road.
- Staggered side to side for good geometric control.

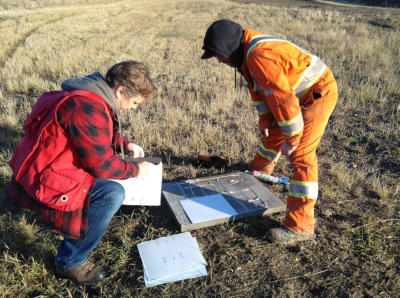
How to Survey GCPs
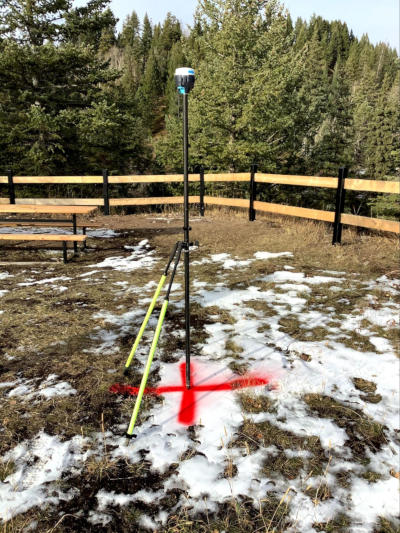
Obtaining high-accuracy survey grade coordinates for your GCPs is critical for the GCPs to have any value. Most of the time, this is done with survey-grade RTK GPS. However, alternatives exist, such as smart targets and GCP-as-a-service.
Affordable drones, combined with the need for better insights, are leading many gravel pits, landfills and construction sites to set up their own low cost drone programs. However, the GPS systems to survey the GCPs can cost anywhere from $5,000 to $50,000 USD.
For regular site specific drone operations, we recommend skipping the purchase of survey GPS. Instead, install permanent Ground Control Points and use the Ground Control Point as a Service solution.
RTK GPS
Options include:
- Purchasing a surveying system from one of the big three (Trimble, Topcon, and Leica) for $40 – $50K.
- Purchasing a discount GPS set from a company such as EMLID for about $5K
- Purchase a subscription system such as Trimble’s Catalyst
GCP as a Service
Civil Tracker provides GCP-as-a service. This service includes the equipment and processing of the GCPs, where the customer installs the GCPs and then uses our one-button system to collect data.
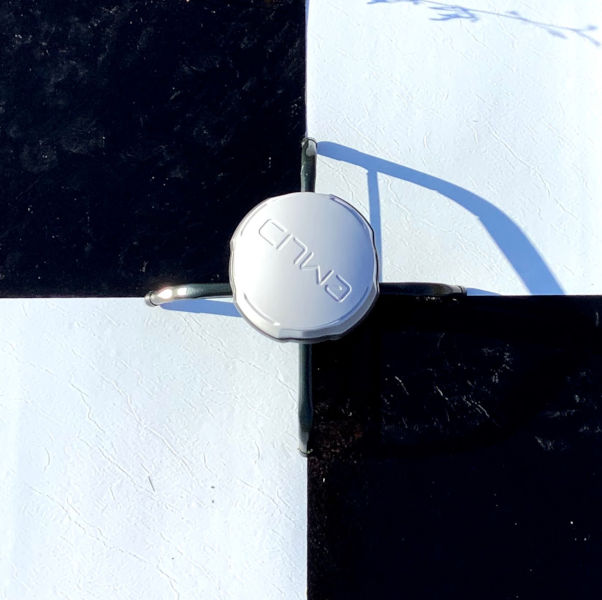
Figure out what works for you.
The best way to become comfortable is to experiment. Try different numbers of GCPs. It can be quite valuable to survey more GCPs than you plan on processing and then use the remaining GCPs for independent checks to ensure data quality.